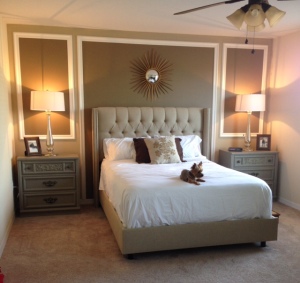
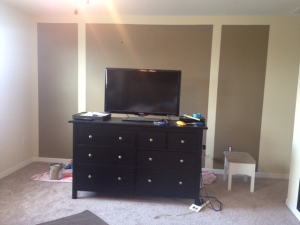
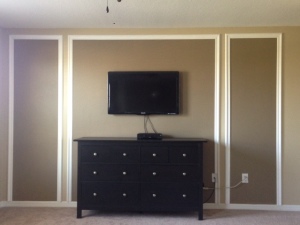
If you’ve seen my Wainscoting post, this one is going to be very similar and uses the same concept. Except it creates a totally different look for my Master Bedroom. I think this project makes a huge impact on the design of your room, and I had seen it done in several model homes and loved it. It’s actually a very “beginner’s level” project, even though it doesn’t look like it. So here we go.
Supplies Needed:
– Painters Tape
– Ultra White Paint
– Two different colors of paint for the walls
– Chair rail moulding (because I had some leftover from my living room project)
– Level
– Measuring tape
– Nail gun and compressor
– Miter saw
– Caulk
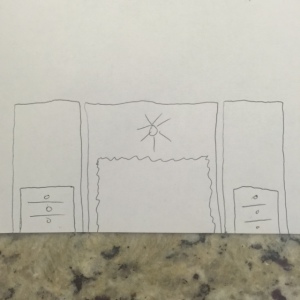
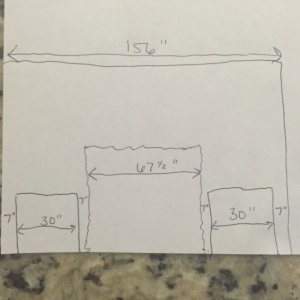
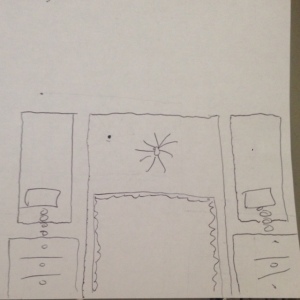
The first thing I did was sketch out my design. The design is based on the dimensions of your wall, the size of your bed, and the size of your nightstands. I wanted the bed and the nightstands to be fully outlined by the moulding. However, my bed measures 67.5″ wide and my nightstands are almost 30″ wide. The wall is 156″ wide so once you subtract out the bed, the 2 nightstands and the space necessary between each piece, there’s not enough room to completely frame out each thing. So I decided I would stick to framing out the bed, and then just adding boxes above the nightstands.
Here’s a visual of how I originally wanted it to be and how it wasn’t possible:
Here’s my modified design to make it work for my room and how I measured the exact dimension of the boxes:
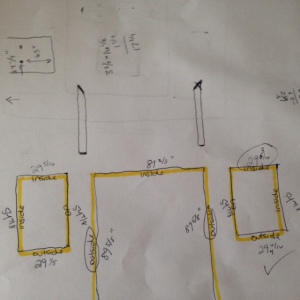
Once you have your design, you will need to select the 2 colors of paint you will be using. One for the walls, and one for inside the boxes. I used Shaker Beige by Benjamin Moore for the walls (thanks to a recommendation from my friend Amy), and Home Decorators Bristol Beige by Behr for inside the boxes. I absolutely love Shaker Beige, as it’s a great grey-beige neutral that’s warm and cool at the same time. And I used Bristol Beige only because it’s what I already had. I used it in our downstairs bathroom previously and had quite a bit leftover so I figured why not? After the fact, it’s probably a little darker than I would have preferred, but it’ll work. If I had it to do over again, I would probably go to the store and find a 4-swatch paint card sample and choose two of the colors on that card. The lighter shade for the walls, and the darker shade of the same color for the inside of the boxes.
I then used a tape measure, a straight edge, and pencil to draw the boxes on the walls. For example, if the first box above the nightstand on the left was 8″ from the corner, I measured 8″ then put a dot, moved down a little bit and measured 8″ again and put another dot, and kept repeating until I could then use a ruler to connect the dots to make the line. That’s how I drew out all the boxes on the wall first. I don’t have a picture because it was so light you couldn’t really see.
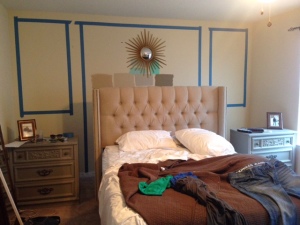
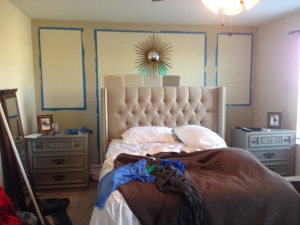
After I had the boxes sketched on the wall, I taped along the inside of the box lines so that I could paint the wall first.
After that dried, I pulled the tape off, and re-taped along the outside of the boxes so that I could paint the inside of them.
Now it was time to start the moulding. I used the same chair rail moulding from my downstairs project because I had some left over, [and because it’s cheap], I mean because it creates cohesiveness throughout the house. It comes primed white but I gave them a coat of pure white before I hung them on the wall.
I cut each piece according to my measurement using my miter saw and making 45 degree angle cuts in the corners. Used my level as a guide, and then nailed each piece in with one nail every 18″ or so.
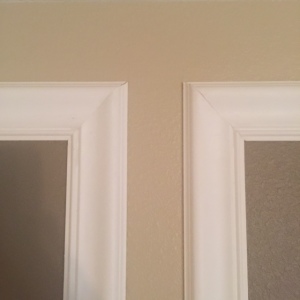
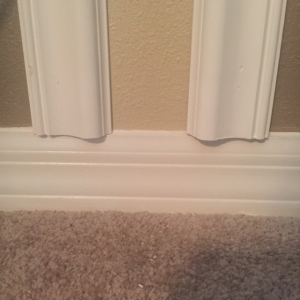
Here you can see how the corners are cut and how the chair rail meets the baseboard. It hangs over a bit but it’s not noticeable at all once you put the furniture back. One thing to keep in mind in the direction of the moulding. It’s not a symmetrical piece of moulding so you have to pay attention to the way it needs cut. Thats what the words “outside” and “inside” are on my highlighted measurement drawing above. It just helped me keep things straight when I was in the garage mitering the pieces.
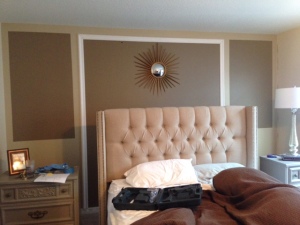
I caulked and touched up the corners of all the boxes, but it really didn’t require caulking along all the sides of the boxes. So I left it as is. Can I get a HOORAY for less caulking?
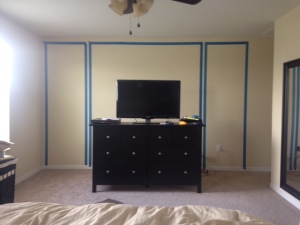
Once I had finished the wall, I stood and looked at the other side of my room and thought “hmm..the room feels very uneven now.” It seemed like all the weight was on the bed wall and I needed something on the other wall to even it out and anchor it. So being the crazy woman that I am, combined with my undying love of symmetry, I decided to do the opposite TV wall the exact same way. Here’s the layout of my room so you can get an idea.
The design, and dimensions, for the TV wall were exactly the same, except the “nightstand boxes” went all the way to the floor instead of being closed off. Like this:
I just repeated all the same steps until I had the same look.
Comment and tell me your thoughts! And stay tuned to see how I decorated these walls and completed my master bedroom makeover!
– See more at: http://www.insivia.com/so-how-do-i-change-that-facebook-thumbnail-image/#sthash.q45UREgc.dpuf
