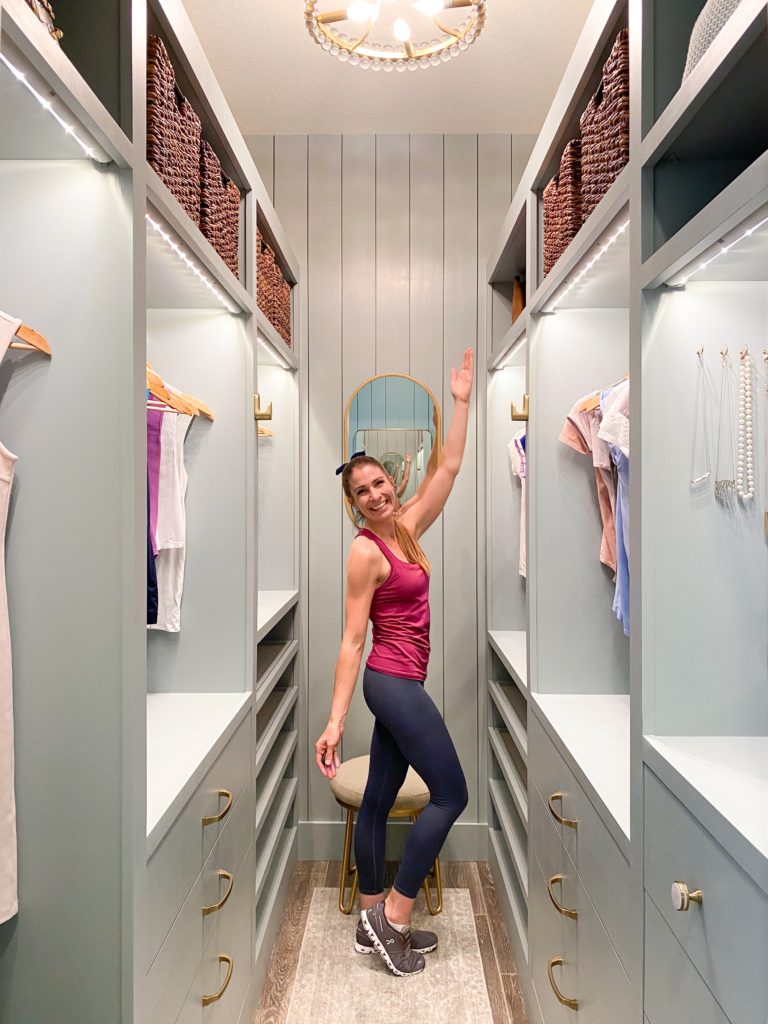
My dream closet is finally complete and I could not be happier about it! I was able to create this beautiful space by using the IKEA Pax closet system and completely customizing it. Below is the before and after picture and a step-by-step tutorial on how I created this IKEA closet makeover. Keep scrolling!
For more IKEA furniture hacks, check out my most recent IKEA tutorial here.


Step 1: Painting Prep

First, I gave each IKEA Pax unit a good sanding so the primer and paint would adhere better. I attached my sander to my shop vac so it would make it a dust-free process. I also filled the holes within the Pax units with wood filler and sanded this down.

Then, I wiped the units down and sprayed the insides of them with my favorite paint sprayer and primer. Primer is super important in this project because paint doesn’t really stick to laminate IKEA furniture, but this primer by BIN is key for doing the trick. I personally love this primer because it dries so quickly and I didn’t have to wait for it to dry before moving on to the next step.
Step 2: Paint

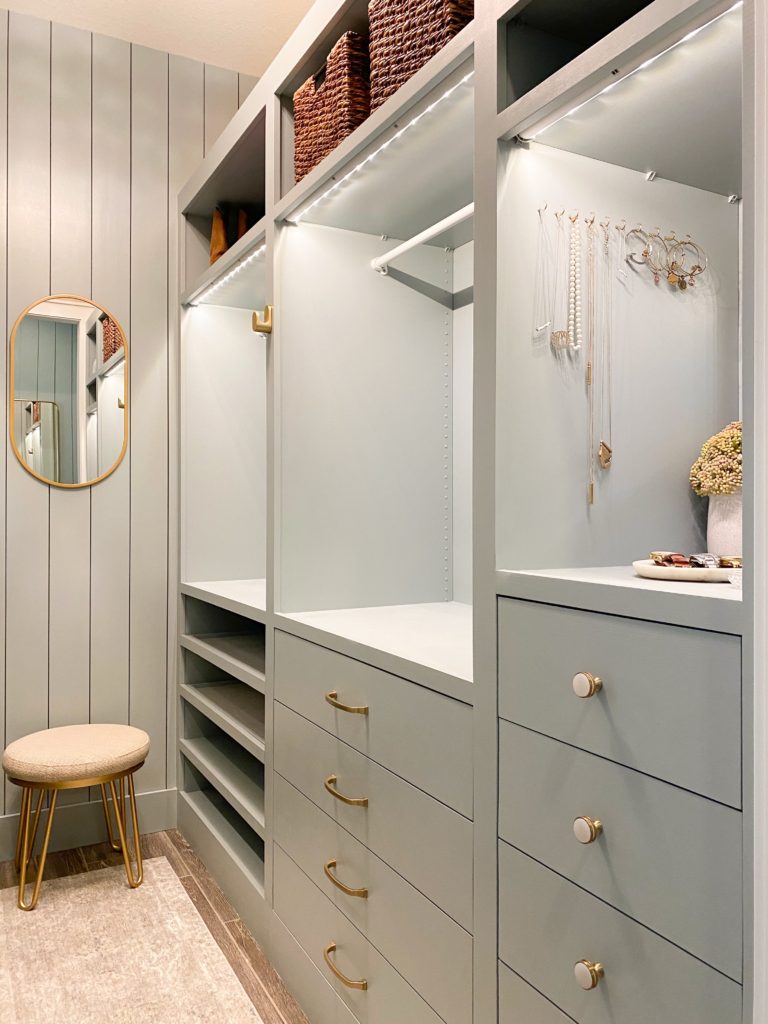
My absolute favorite color is BM Boothbay Gray and I sprayed two coats of it. I suggest always wearing a full respirator mask and goggles when working with paint sprayers! I try to avoid spraying inside at all costs because of how dangerous it is.
Step 3: Put Units in Closet

When installing the units in my closet, I added spacers between each to span the distance equally.
Step 4: Trim & Paint Shelves

Next, I used my table saw to create custom baseboards and trim which completely transforms the look from an IKEA closet to a custom-made one.

Then, I painted these shoe shelves by IKEA (for my tennis shoe addiction) BM Boothbay Gray as well after priming.


After adding custom baseboards, I used sticky notes as shims to make the vertical trim flush.

Moving onto the horizontal trim pieces, I sanded each piece before nailing them with my brad nailer. Also, I cut a sliver for every shelf because they don’t sit flush with the sides of unit.
Step 5: Add Drawer Fronts

For each drawer front I had to miter saw each board to drawer length, table saw each drawer to height, and sand.

Then, I used tile spacers to make the perfect gaps all around the drawers. Also, I put a screw from the inside of the ikea face into the poplar to pull it in tighter. TIP: screw the drawer fronts into the drawer where the hardware will go so there’s only one hole.

Finally, I sanded and filled the nail holes and it’s almost done.
Step 6: Say Bye to the Door

I ditched the door and went with new casing.
Step 7: Paint, Add Hardware, & New Lighting

After some caulking and taping, priming begins! I use my brush to do all the creases and then roll over it immediately to hide the strokes.

Before painting, I gave it a light sand, vacuumed, and tacked cloth.

After painting the drawers BM Boothbay Gray, I drilled the hardware to the drawers.

This beautiful chandelier was purchased from Lighting Design Company and is a perfect finishing touch.
The Complete IKEA Pax Closet Hack Tutorial

After some more details, the IKEA Pax Closet turned out to be one of my favorite projects!